How I Became a Software Developer

Developing software requires a wonderfully unique blend of math, science and art. Some call what we do a craft which rings true to me. All the great developers I’ve known treat everything they do with the respect an artisan would.

I sometimes worry that the modern day ubiquity of easy-to-use computers, now often through mobile and wearable devices, is making it increasingly hard to attract the next generation of developers. While developing software applications is becoming easier in many ways, there are also more layers of abstraction. While it’s easier to pick up and use a computer today, it’s also much harder to get a glimpse behind the curtain — or even a sense that there’s a curtain at all.

I consider myself lucky that I discovered my calling early in life — a true passion that also handily pays the bills. Who could ask for more in a career? Recently I’ve been thinking back on what it took for me to realize this path that I’m on. I’ve narrowed down my primary sources of inspiration into to three separate phases through my formative years.

Phase 1: Childhood Inspiration

One of my earliest memories of impressive technology was a bright red digital Timex Snoopy watch that my parents got for me on a road trip. I was probably 5 years old and this was my first watch. This device really made an impression on me because when you pressed a button, there would be a short animation of Snoopy pitching a baseball. On a watch! To be animated whenever I wanted!

databank-otb

In the mid ’80s, I became quite obsessed with the Casio Databank watch. Yes, the calculator watch that I’m sure many high-school kids were made fun of for wearing — thankfully my elementary school peers didn’t seem to notice or care. Although a fine feature, it wasn’t the calculator that really impressed me on this watch, it was the data storage feature — type in and access 50 short pieces of arbitrary text. This coupled with the nifty LCD display that was capable of scrolling truly readable letters and numbers across the face. I could even play around with this wonderful device during class!

I never really got into watches but it now seems clear that these two watches were quite influential in making me passionate about technology in general.

Also around this time I started being exposed to video games. My grandfather, always quite the techno-enthusiast, purchased a TI-99/4A computer. I never quite got into programming that thing (for more than 20 minutes anyway) but it was really fun playing some of the cartridge games on it including TI Invaders, Parsec (my grandmother’s favorite) and the brutally challenging Car Wars.

fire-mario

My daycare in grade school had a Colecovision which was totally awesome. And then one day my mom amazed me at the local K-Mart by purchasing the Nintendo Entertainment System. This thing was simply wonderful and captured so much of my attention for years. That passion for gaming eventually led to countless hours spent in various arcades and plenty of portable gaming too.

Phase 2: Teenage Tinkering

IBM_PS2_mouse

The next phase of my tech-odyssey revolved around more general purpose computers. My dad became particularly interested in the new personal computing revolution after he read an article stating basically that, as of Windows 3.0, PCs were finally affordable and easy enough to use for everyone. So he picked up a IBM Personal System/2. This thing seemed fairly weird, even at the time: super clicky keyboard, ugly beige color and loud and slow (compared to my Nintendo anyway). My dad used it for keeping books and I used it for, well, everything else. I learned the ins and outs of MS-DOS, played with the Windows 3 UI and pushed this machine to play games. It didn’t have a “real” sound card and mostly bleeped and blooped through the so-called PC speaker. I was absolutely amazed when the delightful Another World managed to play real music and sound effects.

My dad also encouraged me to take a Keyboarding class in high school and got me a “game” for the IBM, Mario Teaches Typing. Mario didn’t help much but the class was super useful. Can you accurately hit the numbers row without looking?

My next machine was a 386 clone and although it was faster and better, the kicker was the Sound Blaster multimedia kit to go with it. That set had a CD-ROM drive and some amazing Lucasarts games (Secret of Monkey Island, Loom) and I spent many hours tinkering with games that were in some ways even better than the ones I adored on the Nintendo.

I also did a bit of BBS-ing with the PS/2 which had a built in 2400 baud modem and then around ’94 got a Sportster so that I could properly connect to the internet. I can still remember fretting over the monthly fee (around $20 I think) for dial up internet. “But what will I use it for?” I can remember seriously thinking. The answer was: IRC, News groups, FTP sites and of course, the good old World Wide Web. This was before most web pages had background colors or images (things were very gray). I remember once buying a magazine that simply listed and described various web pages one might want to visit. I think I visited each of the websites that were in that magazine.

2nd-reality-futurecrew

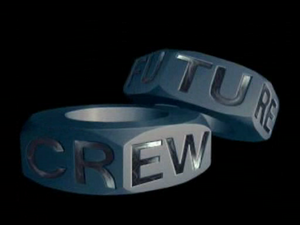
One important thing that the Net brought to me was the demoscene. I was blown away by everything produced by the Finnish group Future Crew and had to download all of their PC demos and tracker music mods. These programs truly inspired me to dabble with music tracking and graphics programming late into the night.

Basically, all of the time I spent with these two machines really opened my eyes up to what computers were capable of — including and well beyond gaming.

Phase 3: Formal Studies

My high school has changed a little since I attended

I am lucky that my high school, North Toronto CI, mostly known for it’s music program had excellent computer science and mathematics programs too. I became curious about CS in 10th grade when my buddy who was fast-tracking — taking the class a year earlier than recommended — let me browse through his textbook one day. The next fall I decided to give it a shot and that led to three great years of CS in high school.

These classes were taught with a sincere passion by John Carter and Gerry Heffernan. The 11th grade class was intro to programing with Pascal, 12th grade was C with more advanced fundamentals and 13th grade was intro to C++ and OO along with independent studies. (Yes, we once had grade 13 in Ontario — a fine thing to have had).

I fondly remember spending class time discovering and playing Nibbles, a game that shipped with MS-DOS. I was also quite proud of my two big grade 13 projects. One was a fractal screensaver that did color cycling on fractal images I had generated and the program even stayed resident in memory. The other was a space shooter, the only game I’ve ever bothered writing. (Surprisingly and thankfully, I quickly learned that developing games was not my bag.)

A local software entrepreneur was looking for a few interns and reached out to my CS teacher. A buddy and I interviewed and we got part time jobs after class. This job was completely awesome. I got to learn some Windows programming using Visual Basic and I was able to play with databases (MS Access). It paid $8 an hour. Plus, after the boss went home the younger guys played hours of multiplayer Doom II on the LAN.

By the time I was applying to Universities, I was absolutely sure of my major. This confidence helped me get into my first choice, the University of Waterloo, arguably the top CS undergrad program in Canada. While I can’t say I loved most of my college courses, I did really enjoy the CS and some of the math classes I took. Some of my favorites were Graphics (SGI O2s in the darkened, private lab!), Concurrency, Compilers, Operating Systems, and Chaos & Fractals.

Uwaterloo_seal

Not only did the University of Waterloo develop the first Math faculty in North America, but it developed the world’s largest co-op work program, which was invaluable for me. These work terms helped me pay for my degree and gave me a strong resume that ensured my first full time job. Because of all of this rich work experience I was sure that I was in both the right major and the right career.

Published
Categorized as technology

How I Bluetooth Podcasts in My Car

The iPhone is an amazing podcast consumption device. I absolutely love how you can continue listening where you last left off with no fuss. Here is the exquisitely minimal walking-around listening workflow I use:

  1. Plug in earbuds
  2. Click play on the earbud remote
  3. Listen
  4. Unplug earbuds

Notice that this is the bare minimum number of physical steps to achieve what you’d want and you never need to take the iPhone out of your pocket. Pretty great.

My current buds

I wanted to continue listening to my podcasts in the car, preferably not needing to remove the phone from my pocket. Ideally it would be:

  1. Turn on ignition
  2. Press play on car dashboard
  3. Listen
  4. Turn off ignition

Car Bluetooth Solutions

I’m not sure how many new cars have built-in bluetooth audio but my wife’s 2009 doesn’t. My beloved 2002 RSX doesn’t even have an audio line-in so I needed something extra. It took me three tries until I found a solution that worked well for me and it wasn’t easy to find reviews online that covered the things I cared about. I hope these review notes prove useful to anyone interested.

(Note: all of these solutions support hands-free Bluetooth calling but I rarely make or take calls in the car so I won’t go into that in these reviews. I will mention that phone calls are okay in solutions (1) and (2) and work quite well in solution (3) given the dedicated wired mic and superior audio output quality.)

1. GoGroove

The GoGroove is a fairly well recommended device that plugs into your cigarette lighter (do the kids still know that’s what they were once for?). It uses an FM radio signal to pipe the audio to your car stereo that it fetches via Bluetooth.

1st try: GoGroove

It’s long and kinda ugly but some might like how the pliable stalk allows it to come right up to where you’re used to reaching. I’d much prefer it to be smaller and less conspicuous. The main pros for it are that you can play/pause directly from the GoGroove and the reception is decent (but not great — most likely true for any FM-based bluetooth solution).

Unfortunately mine simply stopped working after about a week (YMMV) so I returned it and decided to try something else.

2. Satechi

I tried the Satechi next which is a similar device but much smaller and sleeker. Unfortunately the reception was noticeably worse than the GoGroove and it required daily physical adjustment to get the audio quality to be bearable. Also, it doesn’t have the ability to play/pause the audio directly from the device so you’ll need to fiddle with your phone after starting the car. Both of these flaws are deal breakers.

2nd try: Satachi

3. JVC KD-R810

I needed to bite the bullet and get a whole new class of solution. Last August, after much research, I decided on the JVC KD-R810 in-dash Bluetooth receiver (since superseded by the KD-R900). This was obviously a bigger deal since I needed to replace the stock stereo which meant getting a wiring kit and hiring someone do do the work. (I’m not a DIY car enthusiast so I went to Car Toys for this – their rate was good and they had the proper wiring harness in stock. They did a decent job.)

3rd try: JVC

The benefits were massive: no more FM radio signal — the audio quality is amazing. Also, playback can be initiated from the dash so I achieved the ideal listing workflow mentioned at the top. Once you turn on the car it takes about 5-10 seconds to pair with the iPhone and then you’re good to go (there is an on-screen indicator when it’s ready). Also nice is that the unit has something like 30 different light colors so you can match your interior dash lighting pretty accurately.

The only big con is that there’s no (obvious) way of pausing playback and it’s a little strange that you’re to press “menu” to start the audio playback. But these both aren’t really that noticeable in practice.

Overall I’m very pleased with the JVC and would recommend it.

Podcast Apps

I was eager to use Instacast, an alternative to the iPhone’s “Music” app, mainly to take advantage of its ability to fetch new podcast episodes while I’m out and about. The app is cool but unfortunately due to the way the iPhone manages memory, I couldn’t achieve my optimal listening workflows mentioned at the top. At the end of the workday I would get in my car to go home, press play and start listening to an entirely different podcast — the one queued up in the Music app.

It turns out that after some time using the phone for other activities, iOS would kill the Instacast app so that starting up the audio initiates the default Music app (which I guess never gets terminated by the OS). This was annoying enough that I’ve gone back to using Music and dealing with iTunes again (which thankfully is mostly automatic since the advent of wireless syncing).

Siri in the Car

It’s worth noting that you can invoke Siri on an iPhone 4S by initiating a voice dial through the JVC with a couple of button clicks. Then you can try to say anything (like “Play The Talk Show”) which is pretty neat — when it works. I guess the voice audio quality of the JVC hands-free system isn’t good enough for Siri to always, or even usually, just work.

Update 3/21/2013: Siri has drastically improved since I wrote this post. I rarely need to ask for a podcast or album more than once.

Published
Categorized as technology

Metapad Power Tips


This post describes five of my favorite, yet perhaps nonobvious, power tools within Metapad. They are: Portability Mode, Quick Buffers, Launching Viewers, Quote & Un-quote and Unwrap Lines & Commit Word Wrap.

If you’re a casual or power user of Metapad I hope this article teaches you at least one new trick that you can use to make your text editing more productive.


1. Portability Mode (a.k.a. INI mode)

The newest feature in Metapad is actually fairly hidden — for better or worse. It’s called portability mode and it allows you to save all of your Metapad preferences in a local file (called metapad.ini) rather than in the Windows Registry. This is very handy when you’re moving Metapad around on a thumb drive or if you want to re-install Windows. Even better: you can sync your Metapad settings across multiple computers with Dropbox — just run metapad.exe and metapad.ini within a folder in your Dropbox (it will take up about 0.01% of a free 2GB account).

As a convenience, I added a little feature in Metapad 3.6 that will allow you to migrate your Metapad settings from the Registry into the metapad.ini file. Just type “metapad /m”, as in the following screencap, at the command prompt:

Migrating to INI mode via command prompt


2. Quick Buffers

Quick Buffers are like having 10 extra independent clipboards to work with. You can set their contents using the Settings dialog (see image) or by selecting some text and using shortcut keys (Alt + Shift + [Number 0-9]). You can “paste” their contents into your Metapad files by pressing Alt and the number key corresponding to that Quick Buffer.

Editing Quick Buffers in Settings


(I’m surprised that more text editors don’t have a simlar feature.)


3. Launching Viewers

There are 4 different commands that launch things from within Metapad.

First is a new Metapad window (or instance, hence the ‘i’ in Ctrl+I for the keyboard shortcut). This is different than New File (Ctrl+N), which clears out the current file and starts an empty one. New Window will also create an empty file but will keep your existing file around in the background.

Launching viewers from the menu


The next two commands are for launching the primary and secondary viewers, corresponding to the “1” and “2” toolbar buttons (or use keyboard shortcuts Ctrl+L and Ctrl+J). These viewers are customizable and can be set to run any other program installed on your box. Metapad will pass the current file you’re viewing or editing to those programs. Set the paths to these viewers in the General Settings tab. Common uses are setting web browsers to view your web content (e.g., one for Firefox and the other for IE) or beefier editors that take longer to load but may offer features that Metapad does not.

Lastly, there is the “Default viewer” (Ctrl+D). This will open the program that has been associated with the current document’s file type (or extension). For example, if your computer’s default web browser is Chrome, you could launch the current HTML file you’re editing in Chrome with Ctrl+D and keep the other two external viewers (the primary and secondary) associated with two different browsers — say Firefox and IE as in the example above.


4. Quote and “Un-quote”

There are a number of handy text manipulation tools under the Edit | Convert Selected and Edit | Block menus, where a block refers to one or more lines of text that have been selected prior to using those commands. The following two commands in the Block menu are fairly unique to Metapad and may not be familiar to many folks.

The Quote command (Alt+Q) allows you to prefix each line in the block with a certain customizable string. The default quote string, editable in Settings, is “> ” which, once long ago, was commonly used to indicate lines in an original email that was being replied to. Quote can be used for other things, for example the string ”    * “, could be used to instantly bullet-up a list.

Setting the Quote string


When I added Quote, I also wanted a corresponding “unquote”, which is what the Strip First Character feature (Alt+Z) can be thought of as. This will delete the first character on each line of the selected block. Strip can be very handy for cleaning up things such as code copied from the web that has embedded line numbers.


5. Unwrap lines & Commit word wrap

Lastly we have another pair of tools that I believe is unique to Metapad (at least it was for many moons).

Unwrap Lines (F9) will take a file that has embedded carriage returns (i.e., new lines) and strips them all out. An alternate version Unwrap Lines w/ Space (Alt+F9) will replace carriage returns with a space to ensure wrapped words don’t get improperly joined. Running either of these effectively leaves you with one, potentially really long, line. (Aside: these effects can also be done using the basic (stressed: basic) regex support in the Replace dialog if you are so programmatically inclined).

Wrapping and unwrapping via menu commands


Having one really long line usually isn’t so nice unless you turn on Word wrap mode (Ctrl+W or toolbar button). With wrap enabled, your document text will automatically fit the Metapad window, no matter what its line-length. Once in this mode, you are now able to run the complementary Commit Word Wrap (Ctrl+F9) which looks at how the document is auto-wrapped and sticks in carriage returns in the right spots so that each line’s wrapping is persisted, regardless of how wide the window is.

For example, say you have a document full of writing that has a bunch of lines, each no longer than 60 characters. To make each line at most 80 characters long, you would first ensure Word wrap is on (Ctrl+W if not), then Select All (Ctrl+A), Unwrap Lines (F9), resize the window so that each line is no longer than 80 characters (move your carret and watch the toolbar) and then finally do Commit Word Wrap (Ctrl+F9).


I hope these tips are at least a little enlightening. They were fun for me to remember and write about.

Announcing Metapad 3.6

I am proud to announce a new version of Metapad: 3.6. This release arrives almost 9 years since the last feature release!

Download Metapad 3.6 here

So, what’s in it?

Metapad 3.6 has: a new high resolution app icon, UI & usability updates, a new feature that remembers folders across sessions, better defaults for general settings, UTF-8 file support and the biggest new feature: portability mode.

What is ‘portability mode’?

Portability mode allows Metapad to properly run and save settings on an external or thumb drive and it will not leave any trace on a friend or family member’s system. This is also very useful when you are setting up an additional computer or migrating to a new one – copy over your Metapad directory and simply pick up where you left off.

A glimpse at metapad.ini

Technically portability mode means that all settings, window attributes, menu options, find/replace and recent file histories are stored and loaded in a local text file called metapad.ini (instead of the Windows Registry.) To enter this mode simply ensure that a file named metapad.ini exists where metapad.exe does – or use the one time command line option /m to migrate all your registry settings over.

Cool. So why wait almost 9 years till a new feature update?

About a year ago, after I released the Metapad source code, a fellow named David Millis sent me a code patch with a new feature he wrote for UTF-8 file support. This inspired me to get the code up and running again but I still wasn’t sure that I would get around to releasing a new version.

Then when Windows 7 came out at the end of 2009 and I played around with it I was a little irritated by how shoddy the Metapad icon looked in the task bar (due to the lower resolution scaling up poorly).

Windows 7 taskbar scales Metapad's icon poorly

That feeling inspired me to refresh the icon which was lots of fun. Once that was done I knew a release was forthcoming so I slowly added the other features in my meagre spare time through 2010.

Why is 3.6 twice the size of 3.5?

Thats entirely due to the updated icon. Metapad’s new icon is almost 100 KB which makes the compressed download about 100 KB instead of about 50 KB. But hey, we’re still talking about kilobytes, here – not megas or gigas.

Future proofing Metapad with a massive icon

How did you make the new icon?

I used a neat little app called Opacity for the bulk of the design. I then used the slick tool IcoFX to clean up the pixels on the various size and color palette variations.

Progression of Metapad icon with early 3.6 concept


Wait, isnt Opacity a Mac app?

Yes and 3.6 was mostly developed on a Mac using Parallels to run a virtual Windows 7 machine.

Weird. Will 3.5 language translations work in 3.6?

For the most part, yes although you won’t see the new UTF-8 menu item and some of the settings dialog usability improvements. You will also get a warning upon startup which you can disable via command line option /s (and you might want to stick that into a shortcut to avoid typing it each time at the command prompt.)

What was the hardest part for development?

First, getting Dev-C++ to generate a small binary or one that used the latest common control visual styles (I eventually gave up). Then getting Visual C++ to generate a binary that actually worked on Windows XP without an additional DLL.

What changes are in the beta releases?

Beta 2 was posted on Feb 26, 2011:

  • Fixed “Randal Munroe bug” where Shift+Enter inserted invalid newlines (thanks to Curtis Bright)
  • Fixed Metapad 3.6 not loading on Windows 2000 or Windows 98
  • Fixed INI mode leading/trailing spaces bug for quote string, find/replace history and quick buffers
  • Updated external viewer toolbar icons with numbers for better usability (idea from Gerard Juan)


Beta 3 was posted on Mar 9, 2011:

  • Open/save folder is remembered across launches with option to disable (thanks Paolo)


Beta 4 was posted on Mar 12, 2011:

  • Fixed bug where “save options menu” wasn’t persisting in settings dialog
  • Fixed convert to Title Case bug where apostrophes counted as word boundaries


Beta 5 was posted on Mar 26, 2011:

  • Minor visual refresh to the toolbar buttons

How can I provide my feedback?

Please email “metapad-feedback” at this domain, liquidninja.com. Thanks!

Check out the Metapad homepage for more details and the Metapad twitter feed for news.

Published
Categorized as technology

Deploying with Git

Git, a powerful version tracker, is easily becoming one of my essential software tools. I now use it on every creative project at home and increasingly at work too.

But you might say “I get versioning automatically with Time Machine or Dropbox”. Sure and that’s nice but when you consciously manage versions yourself you can track simultaneous changes across multiple files and you get comments on each version to help you know what changed when. You might say “I already have decent version tracking at work with Subversion/Perforce/CVS”. Well you can still get a great benefit by running Git locally — think of it as a layer of private versioning on top of the shared, published repository.

Although Git’s known as an SCM, or source code manager, Git is also useful for non-coding projects such as graphic art, music, spreadsheets or word processing — things built using tools that typically have no native version management (other than undo and save as). Initializing a new Git repository takes only a couple seconds (!) and tearing one down is just as quick (“rm -rf .git”).

So, deploying?

Okay, we’ve established that Git is awesome but one of my favorite uses of Git is to utilize its distributed nature to maintain and deploy website files. Before I get into the techie details on setting this up, let me explain the benefits of this technique.

Typically, website files exist on a local machine (e.g., laptop) and on a server (e.g., your hosting provider) and one would edit changes locally and then (testing locally is optional) FTP the files to the server. This process is error prone — for example you might forget to transfer one of the files or, even worse, make emergency changes on the server and never make the change locally and later overwrite those server changes, losing them forever.

By using Git and the technique outlined below, you will still have two copies of the files but the synchronization is much simpler. Primary benefits include:

  • You deploy the site by simply typing git push on the local box (or through a visual tool, more on those at the end)
  • Edits made on the remote host can be synchronized locally via git pull
  • After a bad push, roll back by running git reset –hard ORIG_HEAD on the remote host
  • Oh yeah, if they weren’t already, all your website files are now version controlled. Awesome!

How to set your site up with Git

First, if they aren’t already, stick your local website files are in a Git repository.

git init; git add .; git commit -m "Initial import"

(Read a good Git tutorial for more on these commands and how to use Git day-to-day.)

Then, FTP (or scp) the hidden “.git” directory that was created by those commands to the server in the corresponding location in your files (assuming they’re already on the remote host — otherwise send everything over including “.git”).

Next, add the remote host config to the local repository:

git remote add prod ssh://user@example.com/path/to/site

Now, to make a push result in updated files on the remote host (as opposed to only an updated repository record) replace the remote’s .git/hooks/post-update file with a copy of the hook script linked to in this FAQ entry.

Then, to eliminate a warning that Git spits out add the following to the server side .git/config:

[receive]
    denyCurrentBranch = ignore

An optional but recommended step is to set up passwordless SSH to make things super fast and clean. It is also strongly recommended to ensure your server’s .git directory is not allowed to be viewed by anyone browsing your site (see htaccess or the equivalent for your webserver). Also you will want to configure the local repo’s default remote so that you can run “git push” or “git pull” without specifying any other parameters:

[branch "master"]
    remote = prod
    merge = refs/heads/master

Git Tools

If you’re on a Mac and you use TextMate, there is a decent Git bundle that you can add in. (I don’t love the flow but it works.) Also, GitX is a nice graphical UI for Git on OS X. On Windows I’ve enjoyed using Git Extensions. And lastly, here is a nice Git cheat sheet with some more advanced stuff in it.

Published
Categorized as technology