 Lifetracking is becoming a popular trend with the tech crowd. Although I’ve never been one to keep a journal, having gobs of personal data to track my own life trends is attractive — as long as it is relatively painless to gather.
I hadn’t heard of the Nike + iPod system until I found the tucked away setting in my iPhone 3GS and then happened read a good Wired article on it. In brief, the system will measure and record your run or walk workout including distance, time and calories burned while letting you listen to music and giving you audible workout feedback. Then iTunes will sync your data to the cloud so you can follow trends. The article inspired me to give it a go but this little experiment would require a few small purchases before I could start.
Setting Up
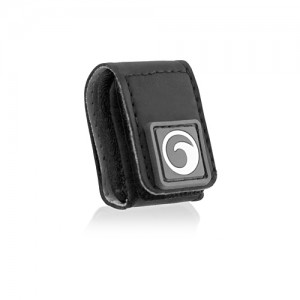
I’ve been into running off-and-on for about 7 years now but haven’t ever had much luck integrating a music player into my routine. My manager recommended the Tuneband ($13) which is a rubber glove for an iPod and a velcro strap for your arm. Seemed simple enough so I picked up the version for my 8gb iPod Nano G2.
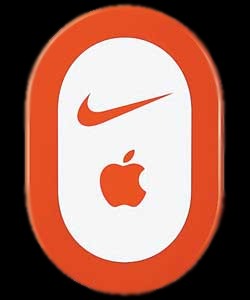
Next I ordered the Nike+ sensor kit ($29). This comes with a sensor for your shoe and a small receiver for an iPod. If you have a newer iPod Touch or an iPod 3GS the receiver part is not needed (it’s built in already) so you could save 10 bucks and get the sensor alone. But the thought of running and lugging an iPhone versus a light Nano was a turn off — unless you’re single or in sales and need to be on the grid 24/7. One side note is that the unboxing wasn’t very pleasant — obviously Apple didn’t design this packaging.
The last thing I needed was something to affix the sensor to my shoe. One could simply do as Nike intends and get a pair of compatible Nike+ runners (which have a special compartment under the insole). But since I haven’t worn Nikes since grade school (Agassis FTW!) this dedicated New Balance guy needed something else. After researching online I settled on the Marware pouch ($9) which looks pretty slick and works great. Simply insert the sensor face down (this is critical) and strap tightly to your laces. Ready to rock!

The Tests
My first test consisted of a brisk walk to the post office on Saturday. I was more interested in running but I had a pack on my back full of packages to mail so a brisk walk would have to do. I picked a playlist (Oakenfold’s latest) and set off and everything just seemed to work.
On Sunday I tried a short run. I decided to skip calibration because I thought I could do it after the workout. Unfortunately after my run I found out that is only possible using a G4 Nano or a Touch/3GS — annoying. I later used the awesome Gmap Pedometer to measure my run distance and it turns out the Nike+ was off by about 10%. I hear this error is somewhat enhanced when you use a shoe pouch so for my next run I’ll do a proper calibration by running a known distance.
At one point early on in my run the workout stopped because the sensor got dislodged (either by the tuneband case or by not inserting it fully). This resulted in one actual run being split into two workouts which is a little annoying. Unfortunately there is no way through the iPod software (or later through iTunes or Nike+) to merge two workouts into one. Next time I’ll try having the iPod upside down in the Tuneband so the sensor is at the top. I think it may be easier to read the screen that way too.
Impressions
The first notable feature is the pleasant female voice feedback (male is available too) that fades into your song and reports your current time, distance and pace (cool!) whenever you hit the center iPod button. There is useful pause option if you get stuck at a red light or want to stretch. They also added a nice touch when you beat your longest workout record: a famous athlete’s voice will congratulate you.
The Data

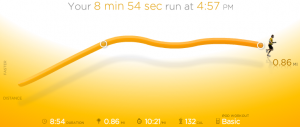
You can view some workout stats on the iPod itself but when you next sync it with iTunes, you’ll be asked if you want to upload the data to nikeplus.com. It’s pretty easy to get going but you’ll then need to create an account on the Nike website (ugh, more spam… I mean marketing opportunities). The Nike website immediately shows your latest run in detail and it’s pretty cool to see your running speed tracked over time. Unfortunately the site is all Flash and it’s usability could stand to see some major improvements. It also has lots of social components like public goals, contests, avatars etc. which aren’t too appealing to me at the moment.
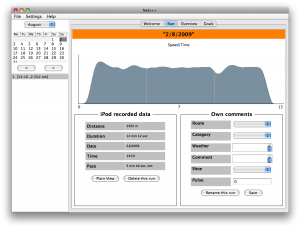
I’m not sure I love the idea of a sporting goods company storing my personal lifetracking data. I found another online option called runnerplus.com which is supposedly more advanced but also very social. But since all of the pedometer data is stored on the iPod in XML (you can find and even edit it if you want to) there are other options such as the Neki++ open source desktop app that I’m eager to try out. I’d love to find a self hosted, open source web app so I can both own my data and easily share/compare with friends and family.
Overall this product is very cool and adds a new dimension of fun to walking and running. I’m looking forward to using it some more and I wonder if it will introduce a beneficial Hawthorne effect on my exercise regime.
Update (8/8/2009)
My next run was more successful. Before I started I used Gmap pedometer to measure exactly 0.25 miles and then ran and walked it to calibrate. This corrected the Nike+ by about 15% for both walking and running! I also tried wearing the TuneBand upside down which worked out very well.

Later, I used Neki++ to pull and display my workout data locally. It doesn’t have a lot of polish visually or feature wise (e.g., no way to switch out of metric measurements) but it worked without a hitch and provides much of the same workout functionality that the Nike website does — without having any data privacy issues.
